Family Sharing is an incredible feature that Apple offers, allowing up to six family members to enjoy Apple services, including Apple Music, without the hassle of separate accounts for everything. It’s a fantastic way to share subscriptions, apps, movies, and more, all while maintaining individual Apple IDs. If you’re looking to get the most out of your Apple Music subscription and ensure everyone in your household can tune into their favorite tracks, setting up Family Sharing is the key.
With Apple Music Family Sharing, gone are the days of sharing one Apple ID and disrupting each other’s listening history and recommendations. Each family member gets their own personal Apple Music experience while being part of a shared family plan, usually at a much better value than individual subscriptions. This guide will walk you through the simple steps to set up Family Sharing and bring the joy of Apple Music to your entire family.
Start Your Family’s Musical Journey: Creating a Family Group
The first step to enjoying Apple Music as a family is to establish a Family Sharing group. This is easily done by the family organizer, who is usually the adult setting up the plan. This organizer will manage the family settings and is responsible for any shared purchases if purchase sharing is enabled. Make sure the family organizer has a valid payment method on file. Here’s how to get started on your iPhone, iPad, or Mac:
Setting Up Family Sharing on Your iPhone or iPad
-
Begin by opening the Settings app on your iPhone or iPad.
-
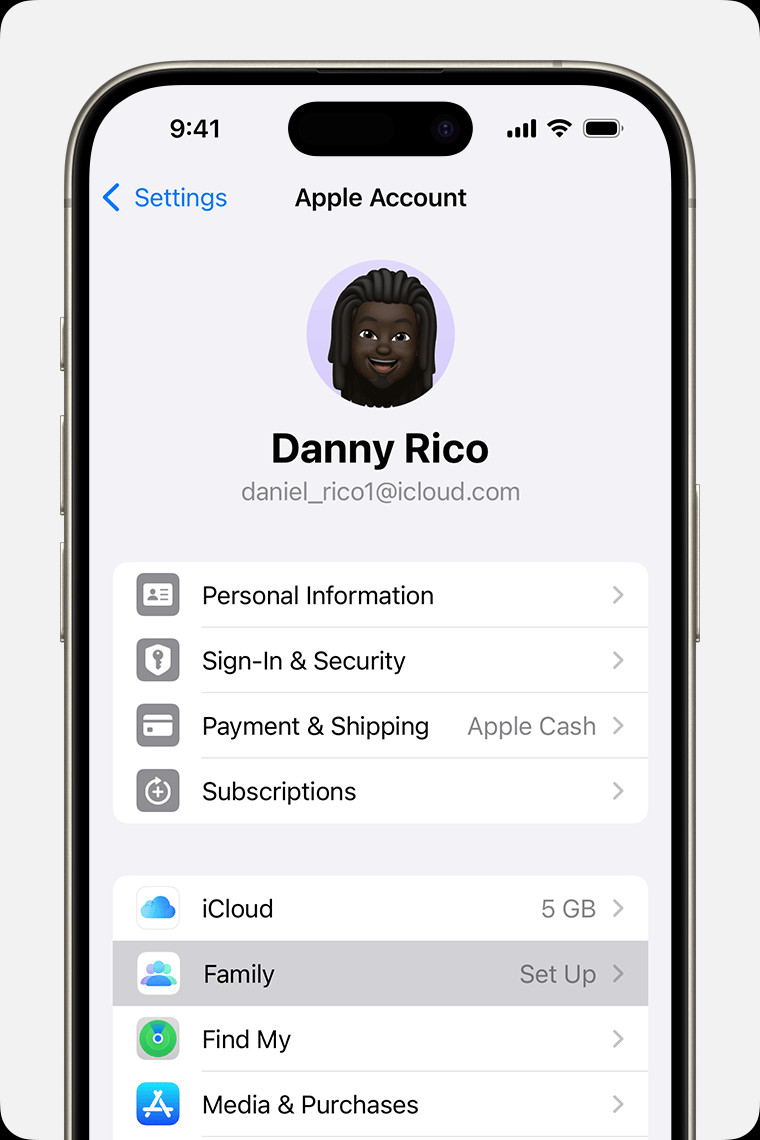
Tap on your name at the top of the Settings menu.
-
Select Family (or Family Sharing). Then, tap Set Up Your Family.
 iPhone screen showing the steps for setting up Family Sharing.
 -
Follow the straightforward on-screen instructions to complete the setup process and invite your family members to join.
Setting Up Family Sharing on Your Mac (macOS Ventura or Later)
-
Go to the Apple menu in the top-left corner of your screen and select System Settings.
-
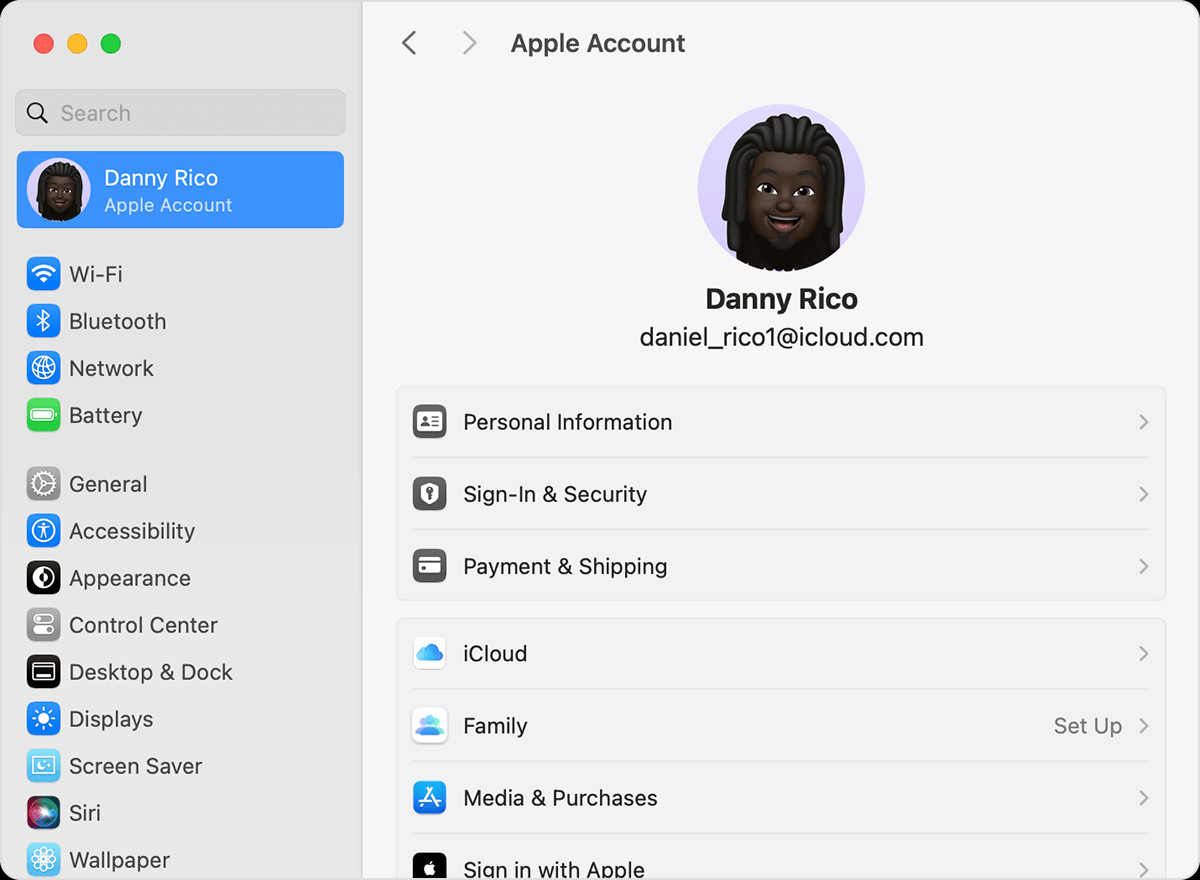
Click on your name, then click Family (or Family Sharing) in the sidebar.
 macOS screen showing the steps for setting up Family Sharing.
 -
Click Set Up Family.
-
Proceed by following the on-screen prompts to set up your family group and send out invitations to family members.
Expanding Your Musical Circle: Inviting Members to Your Family Sharing
Whether you chose to skip inviting members during the initial setup or want to add more family members later, sending invitations is simple. You can invite individuals via Messages, email, or even in person. Each family member will need their own Apple ID to join.
Inviting Family Members on iPhone or iPad (iOS 16 or Later)
-
Open the Settings app, then tap Family.
-
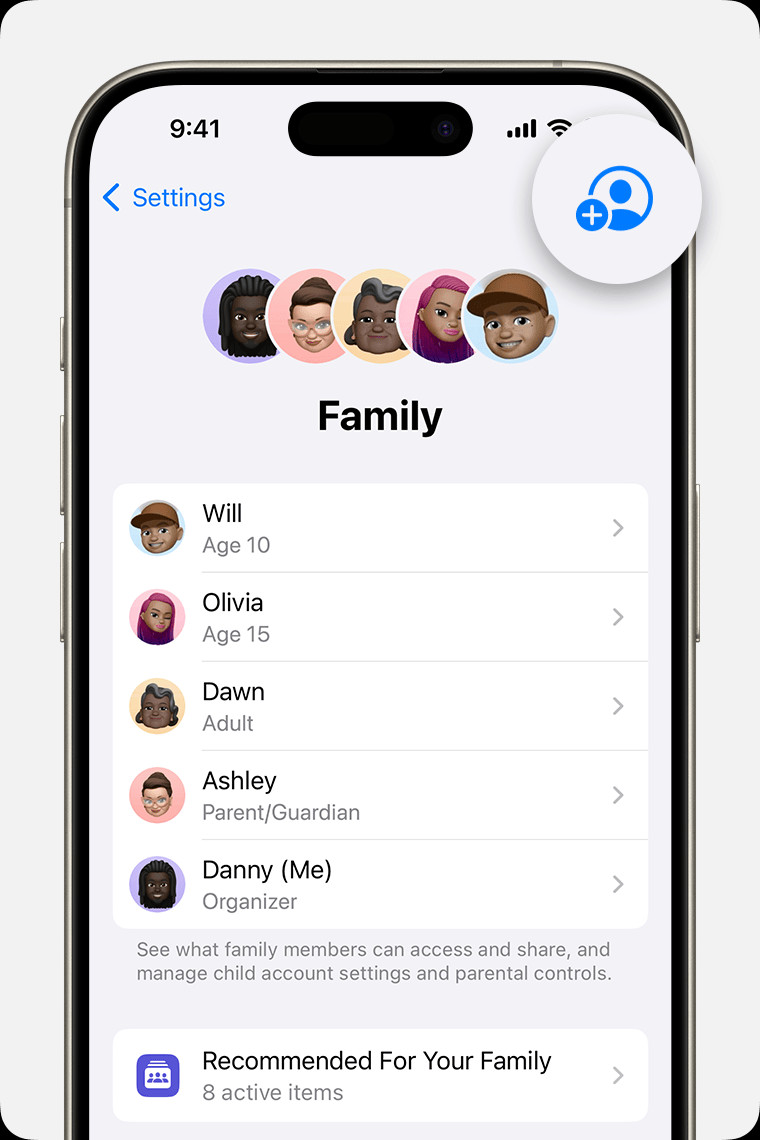
Tap the Add Member button.
 iPhone screen showing the steps for adding a member to your Family Sharing group.
 -
If you’re adding a child who doesn’t have an Apple ID, tap Create an Account for a Child. If they already have one, tap Invite People. They will need to enter their Apple ID password on your device to accept.
-
Continue following the on-screen instructions to configure parental controls, location sharing, and other optional features.
Inviting Family Members on Mac (macOS Ventura or Later)
-
Go to the Apple menu > System Settings.
-
Click Family.
-
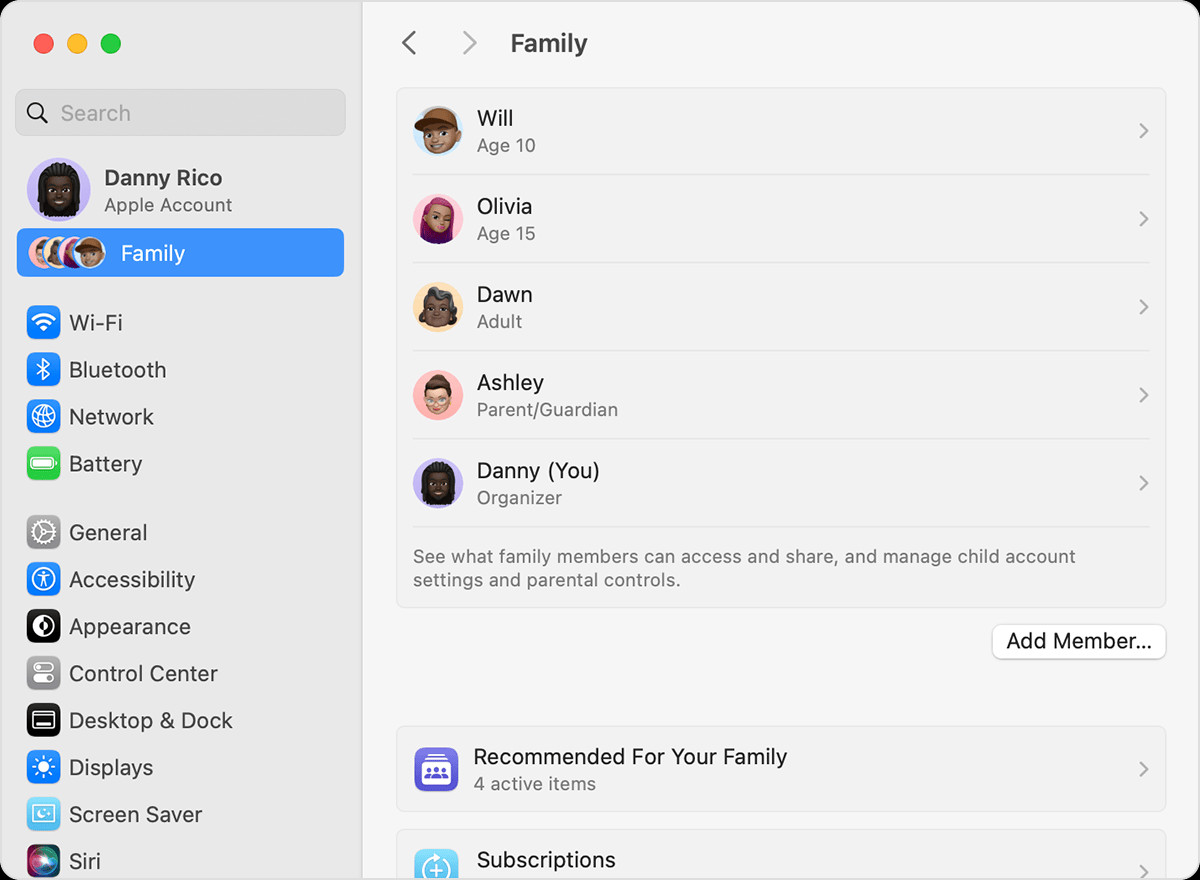
Click Add Member, and follow the on-screen instructions to send your invitation.
 macOS screen showing the steps for adding a member to your Family Sharing Group.
Checking Invitation Status and Resending Invites
After sending an invitation, you can easily check its status and resend it if necessary.
On iPhone or iPad
- Open Settings, then tap Family.
- Tap the person’s name to view the invitation status.
- If needed, tap Resend Invitation.
On Mac (macOS Ventura or Later)
- Go to Apple menu > System Settings, then click Family.
- Click the person’s name to see the status.
- Select Resend Invitation if the invite has not been accepted.
Joining the Family Jam: Accepting a Family Sharing Invitation
If you’ve been invited to join Apple Music Family Sharing, accepting the invitation is straightforward. You’ll receive an invitation via email or text message, which you can respond to directly. If you missed it, here’s how to accept from your device:
Accepting an Invitation on iPhone or iPad
- Open the Settings app, then tap your name.
- Tap Invitations.
Follow the on-screen instructions to accept. You might be prompted to confirm your account details and agree to any features or services set up by the family organizer.
Accepting an Invitation on Mac (macOS Ventura or Later)
- Go to Apple menu > System Settings.
- Click Family.
Follow the on-screen prompts to accept the invitation and confirm your account details as required.
Troubleshooting Invitation Issues
If you encounter issues accepting an invitation, ensure you haven’t already joined another Family Sharing group. Remember, you can only be part of one family group at a time, and switching groups is limited to once per year.
By following these steps, you’ll have your Apple Music Family Sharing set up in no time, allowing everyone in your family to explore millions of songs, personalized playlists, and radio stations. Enjoy the harmonious experience of Apple Music together!
