
Last year, our family Halloween costumes were a huge hit, and we thought it would be impossible to top them! But inspired by the magic of classic children’s books, we decided to take on a new challenge: Alice in Wonderland family costumes. Get ready to fall down the rabbit hole of creativity as we guide you through making these unforgettable, show-stopping costumes.
Costume Inspiration
For years, I’ve been captivated by this exquisite vintage fabric illustrated by Charles Voysey. His classic depictions of Alice in Wonderland characters are simply stunning, with colors and character portrayals that have lingered in my mind. It sparked an idea – why not transform this beautiful fabric into our family’s costumes? The thought of our children dressed as a whimsical walrus and a card-clad rabbit was an opportunity too enchanting to miss. And that’s how our Alice in Wonderland family costume adventure began!
How to Recreate Alice in Wonderland Family Costumes
Let’s be honest, these Alice in Wonderland family costumes aren’t a last-minute, quick fix. However, the final result is breathtaking and absolutely worth the investment of time, especially if you plan ahead. Here’s your guide to recreating these magical looks:
Walrus Costume
I had envisioned a walrus costume for either Jasper or Felix this year. Since Jasper was expressing more opinions about his costume choices, and Felix was happily agreeable, the walrus was destined for him. Here’s how we brought this character to life:
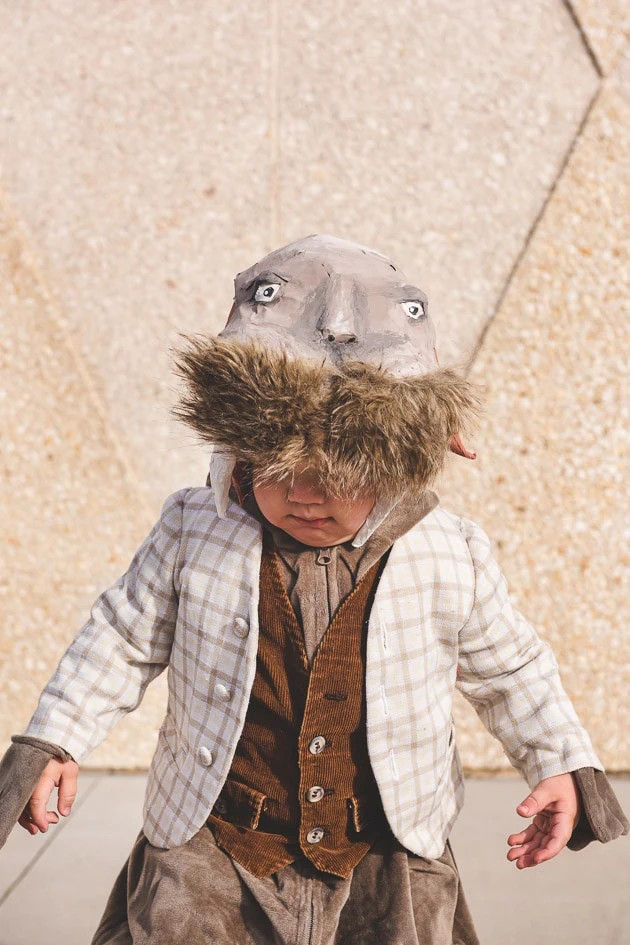
 Felix wearing a paper mache walrus hat and a walrus jumpsuit, part of his Alice in Wonderland family costume.
Walrus Hat
A huge shoutout to Carrie, the paper mache mastermind behind our incredible walrus and rabbit hats! Her skills took these costumes to another level. Here’s how to create the walrus hat:
- Cardboard Base: The foundation of this costume is a sturdy cardboard understructure. Use our photos as your visual guide to cut and shape the cardboard pieces. Gaff tape is your best friend here – its amazing stickiness is perfect for holding the cardboard together.
- Paper Mache Magic: Once your cardboard structure is assembled, it’s time for paper mache. Mix one part flour with two parts water. Heat this mixture in the microwave or on the stovetop until it slightly thickens (you want a paste-like consistency, not too watery, not too thick).
- Layering and Drying: Tear newspaper into strips, dip them into your paper mache paste, and apply them to the cardboard hat until it’s completely covered. Patience is key – let it dry completely. This can take a couple of days, so factor this drying time into your costume schedule!
- Paint and Details: Once the paper mache is fully dry and hardened, unleash your creativity with paint! Add all the walrus details and finishing touches, like textured fur, to bring your hat to life.
- Securing the Hat: To keep the hat securely on your child’s head, attach a piece of string to each side of the hat. These strings can then be tied comfortably under your child’s chin.
 Close-up showing steps of painting a paper mache creation, likely part of the Alice in Wonderland family costumes project.
Walrus Outfit
For the walrus body, we opted for simplicity and purchased a walrus jumpsuit. This allowed us to focus our energy on the spectacular paper mache hat. We found our jumpsuit here. To complete the look, we added some thrifted clothing pieces (thanks to my sister for the assist!). Check your local thrift stores for similar clothing options to give your walrus a unique, vintage feel.
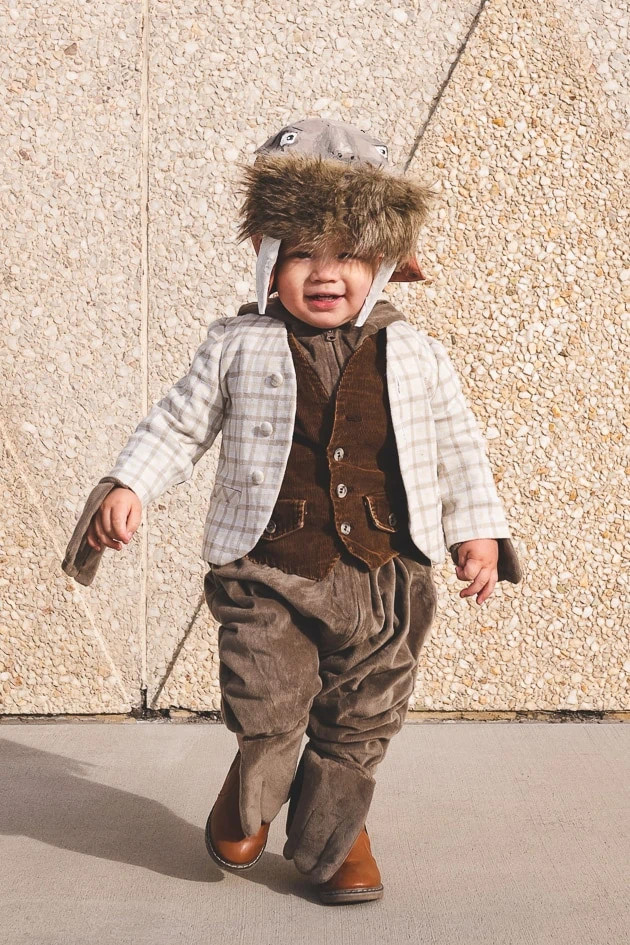
 Felix in full walrus costume, standing outdoors, showcasing the walrus jumpsuit and paper mache hat.
Rabbit Costume
Jasper took on the role of the rabbit, and we hoped the awesome paper mache hat would keep him happy with the choice. “Content” might be a strong word – we at least managed to capture some photos before the Spiderman costume inevitably made an appearance! Here’s how to create the rabbit part of our Alice in Wonderland family costumes:
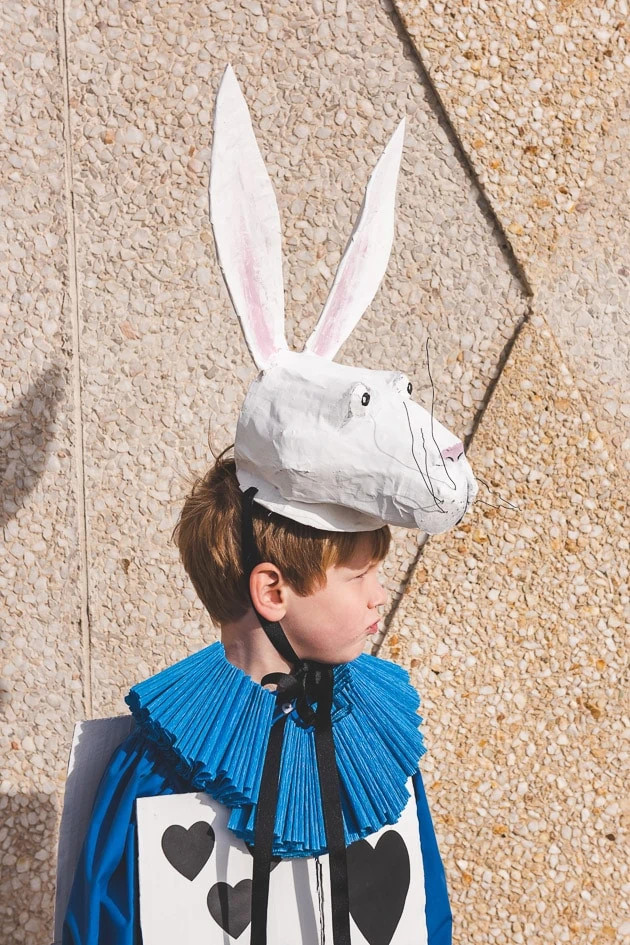
 Jasper wearing a paper mache rabbit head and costume, a key character in their Alice in Wonderland family theme.
Rabbit Hat
- Cardboard Understructure: Just like the walrus hat, start by cutting out and assembling the rabbit hat’s cardboard base. Refer to our photos for shape and structure guidance.
- Paper Mache Application: Follow the same paper mache instructions as above to coat the rabbit understructure. Pro-tip: We noticed the ears started to droop a bit once coated in wet paper mache. To prevent this, prop a cardboard box behind the ears to support them while they dry. Once fully dry, the stiff paper mache will hold the ears upright perfectly.
- Painting and Embellishments: When the paper mache is dry, paint your rabbit hat! Add any embellishments you desire to enhance the rabbit character. We used thin, black floral wire to create realistic whiskers.
- Hat Attachment: Secure the hat to your child’s head by tying strings to each side and fastening them under the chin, just like the walrus hat.
 Close-up of the rabbit paper mache head, highlighting the detail and craftsmanship of the Alice in Wonderland costume.
Shirt
The easiest approach for the rabbit’s shirt is to buy a shirt with puff sleeves. Unfortunately, we couldn’t find one that would arrive in time, so we opted for a DIY puff-sleeve shirt instead. You can adapt a plain shirt by adding gathered fabric at the shoulders and cuffs to create the puff sleeve effect.
Collar
For the rabbit’s distinctive collar, we used crepe paper, string or yarn, and an embroidery needle. We employed the same technique we used for our vintage clown costumes. It’s surprisingly easy and adds a fantastic touch!
Cards
- Cardboard Squares: Cut eight pieces of cardboard, each measuring 6 ½” wide and 9 ¾” tall, to form the playing cards.
- White Base Coat: Paint all the cardboard pieces white. We used white house paint and a large brush to speed up the process. We painted these at the same time as Paul’s larger card pieces to maximize efficiency.
- Card Suit Templates: Once the white paint is dry, use a Cricut machine to cut out card suit shapes using our provided templates. Tape these suit shapes onto the white-painted cardboard squares.
- Assembly: Attach the cards together using ribbon and staples to create the card body piece for the rabbit costume. Use ribbon and staples again to join the front and back card panels.
Feet
Rabbit feet are simple! All you need is some white faux fur. Tear the fur to roughly the size of your child’s shoes. Use safety pins to attach elastic straps to the fur pieces, creating loops to secure them over your child’s shoes.
Brittany’s Outfit
I’m not entirely sure of the official name of Brittany’s character, as we drew inspiration from the illustrations rather than strictly adhering to the book’s character names. Let’s call her a knight character for now! Honestly, we primarily created this costume because the illustrated outfit was utterly captivating. Here’s how to recreate this unique look:
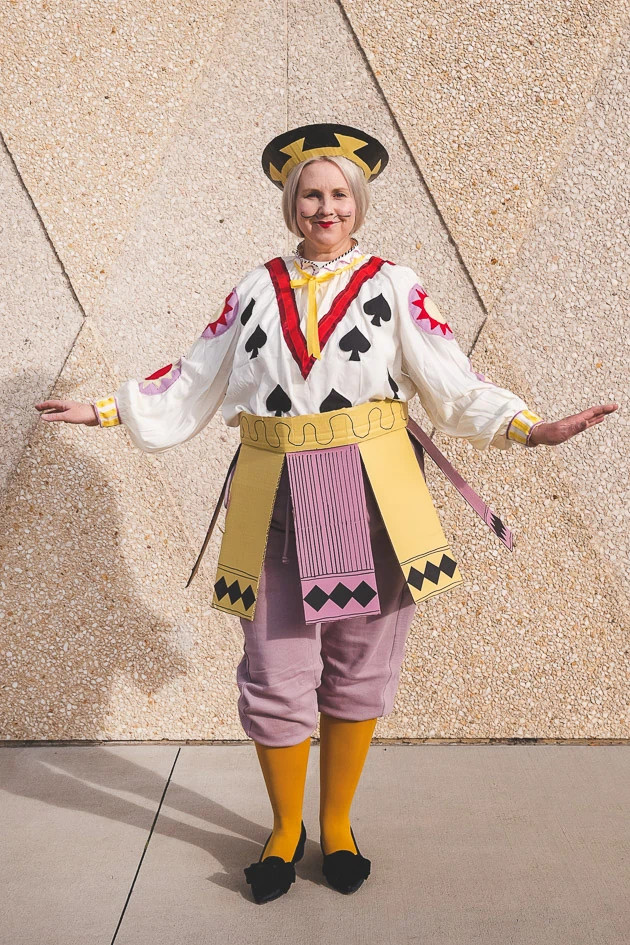
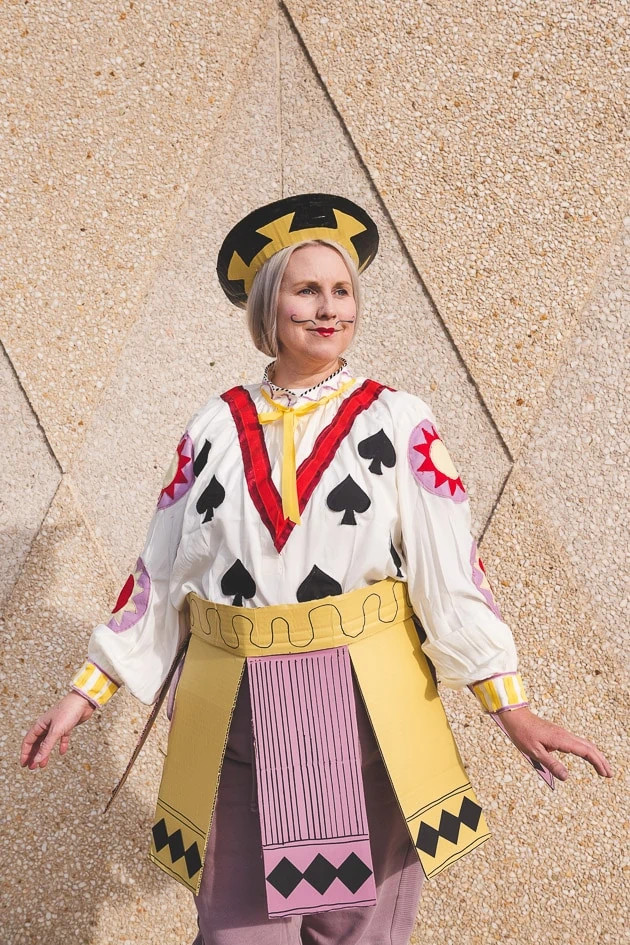 Brittany in her knight-inspired Alice in Wonderland costume, featuring cardboard skirt, hat, and dramatic makeup.
Cardboard Skirt/Hat
- Shape and Assemble: Using our photos as your guide, cut out and assemble the cardboard shapes for the torso, skirt, and hat pieces.
- Paint to Match: Paint the cardboard pieces, referencing our photos for color matching and design details.
- Dramatic Makeup: Don’t forget the makeup! Have fun creating a bold and theatrical makeup look to complete the knight character.
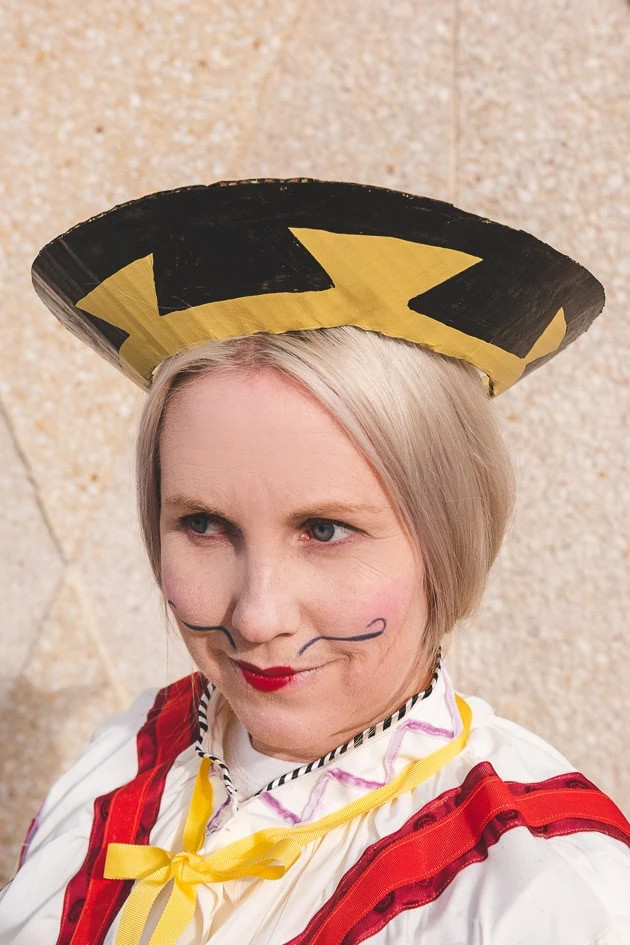 Close-up of Brittany's face with stylized makeup, part of her knight costume in the Alice in Wonderland family theme.
Pants/Tights
For the lower portion of Brittany’s costume, we used a mauve pair of sweatpants, cutting them off and gathering them at the knees to create a puffed effect. We paired these with golden yellow tights for a vibrant contrast.
Blouse
The blouse was a key element of Brittany’s outfit. We needed statement puffy sleeves, which we found here. To enhance the blouse, we cut out fabric embellishments and appliqued them onto the sleeves using a simple zig-zag stitch around the edges. Refer to our photos for the specific shapes and placement of these embellishments!
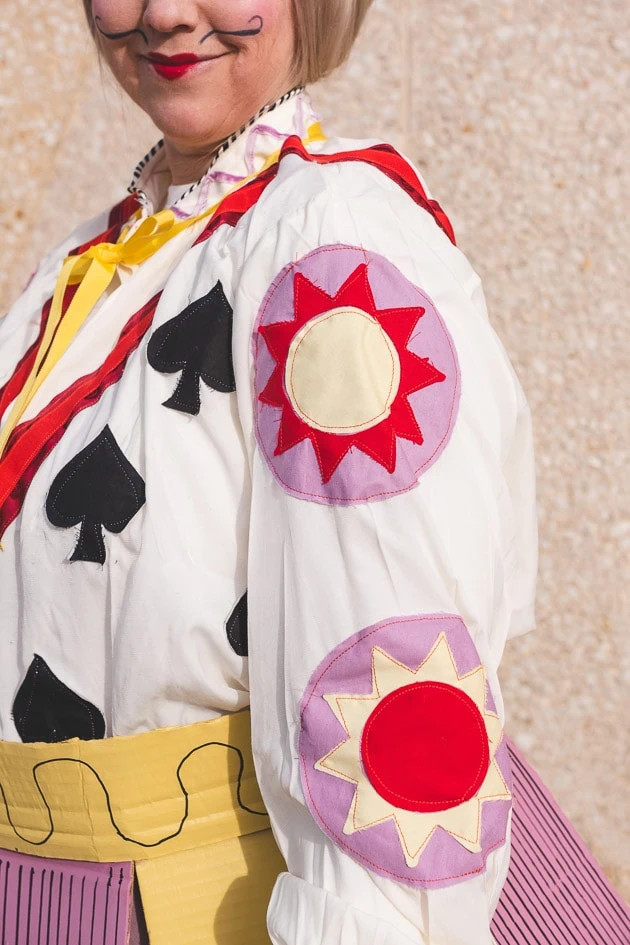 Brittany wearing a blouse with puffy sleeves and fabric embellishments, part of her detailed knight Alice in Wonderland costume.
Shoes
The shoes needed to have a vintage, pilgrim-shoe aesthetic. Serendipitously, Brittany already owned the perfect pair!
 Close-up of Brittany's shoes, vintage-style pilgrim shoes completing her knight costume look.
Paul’s Outfit
The final costume to complete our Alice in Wonderland family ensemble was Paul’s. His character was a card man, wearing an all-blue outfit and hood. This costume was straightforward to put together! Here’s what we did:
Blue Outfit
For the base of the card man costume, we purchased a simple blue sweatsuit with a hood. We found ours here and here. The sweatsuit provides a comfortable and easy foundation for the card elements.
Cards
- Large Cardboard Panels: Cut two large pieces of cardboard. They should be the same size and large enough to cover Paul’s torso from shoulders to knees.
- White Paint Base: Paint both cardboard pieces white. We used house paint and a roller to make quick work of this step. Alternatively: you could use white foam core or mat board and skip the painting step altogether for a smoother finish.
- Card Suit Templates: Once the paint is dry (if painting), use a Cricut to cut out card suit templates from black cardstock. Glue or tape these suit shapes onto the white cardboard panels.
- Joining the Panels: Attach the two cardboard panels together at the shoulders and sides using ribbon and staples to create a wearable card sandwich. We also reinforced the structure with gaff tape for extra durability.
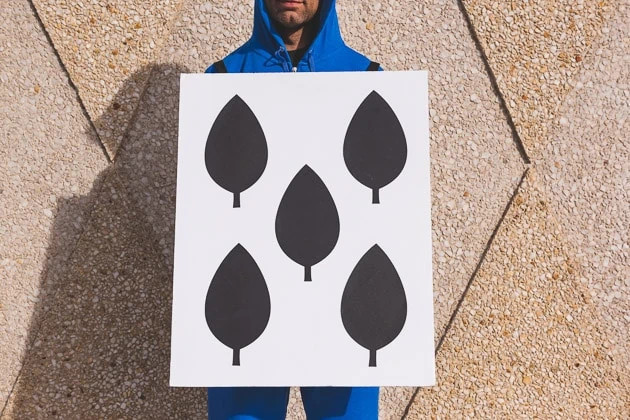 Paul in his card man costume, featuring large cardboard cards and a blue hooded sweatsuit, a simple yet effective costume.
Shoes
The last essential element of Paul’s costume was the footwear. Similar to Brittany’s costume, we needed classic-looking shoes. We ended up using simple black shoes that Paul already owned. We recommend checking thrift shops – they often have hidden gems perfect for completing costume looks.
And that’s a wrap on our Alice in Wonderland family costumes! What do you think? We had so much fun bringing these whimsical characters to life.
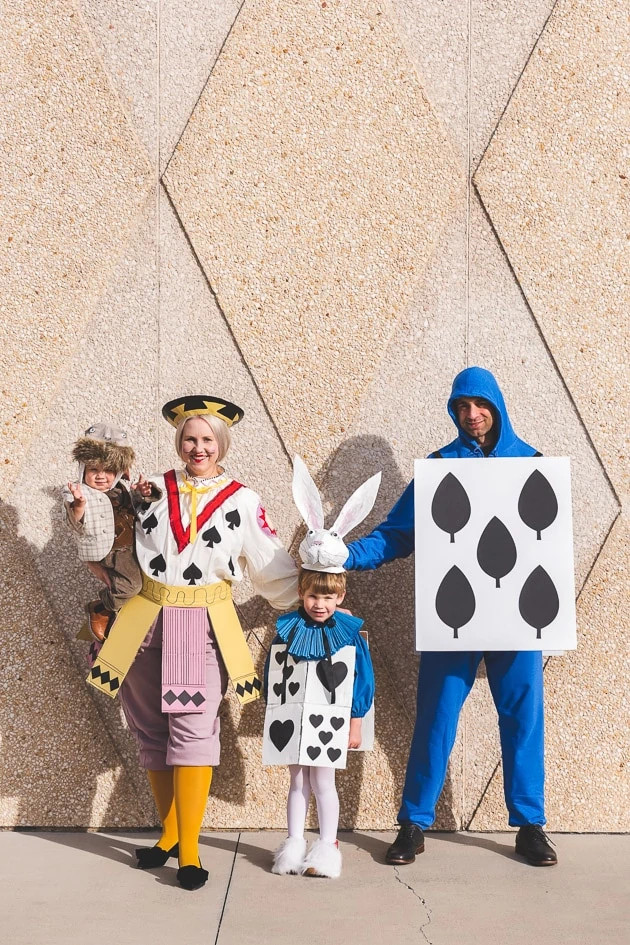 The whole family in their Alice in Wonderland costumes: walrus, rabbit, knight, and card man, posing together in a garden setting.
More Inspiration
Loved these Alice in Wonderland family costumes and craving more costume ideas? Explore these classic Halloween costumes for kids! Don’t miss our vintage clown costumes, Barbiecore costume, wild things costumes and Campbell’s soup cans. Dive into our blog archives for a treasure trove of costume inspiration. And for last-minute Halloween solutions, check out this post featuring fantastic ideas from our shop!