
Apple Family Sharing simplifies digital life for families, allowing up to six members to seamlessly share Apple services, purchases, and more, all without the hassle of sharing a single Apple ID. This guide will walk you through setting up and utilizing Family Sharing to enhance your family’s digital experience.
Starting Your Family Sharing Journey
The first step is to designate a family organizer, usually an adult in the household. This organizer will be responsible for setting up the Family Sharing group from their iPhone, iPad, or Mac. It’s important to note that if purchase sharing is enabled, the family organizer’s payment method will be used for all family members’ purchases.
Setting Up Family Sharing on Your iPhone or iPad
-
Begin by opening the Settings app directly on your iPhone or iPad.
-
Tap on your name located at the top of the Settings menu.
-
Select Family or Family Sharing. Then, tap Set Up Your Family to initiate the process.
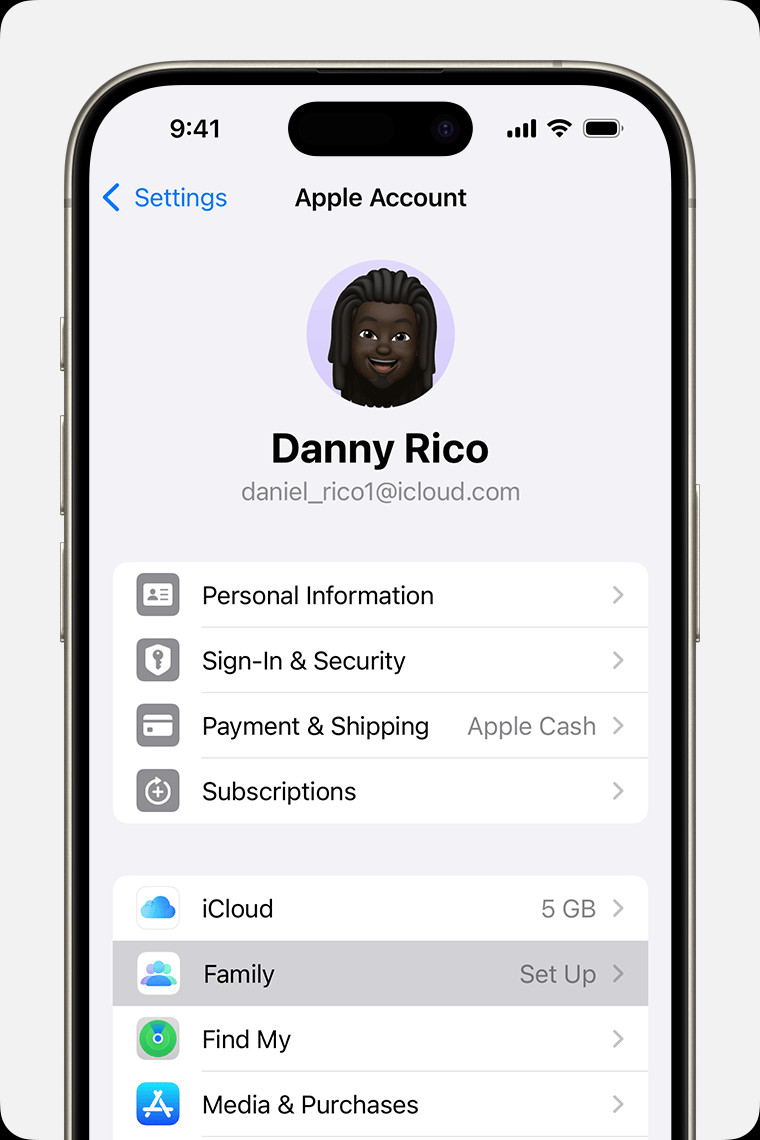 iPhone screen showing the steps for setting up Family Sharing.
 -
Follow the on-screen prompts to complete the setup. This will involve inviting family members to join your newly created group.
Setting Up Family Sharing on Your Mac (macOS Ventura and Later)
-
Go to the Apple menu in the top left corner of your screen and select System Settings.
-
Click on your name, then click Family or Family Sharing in the settings menu.
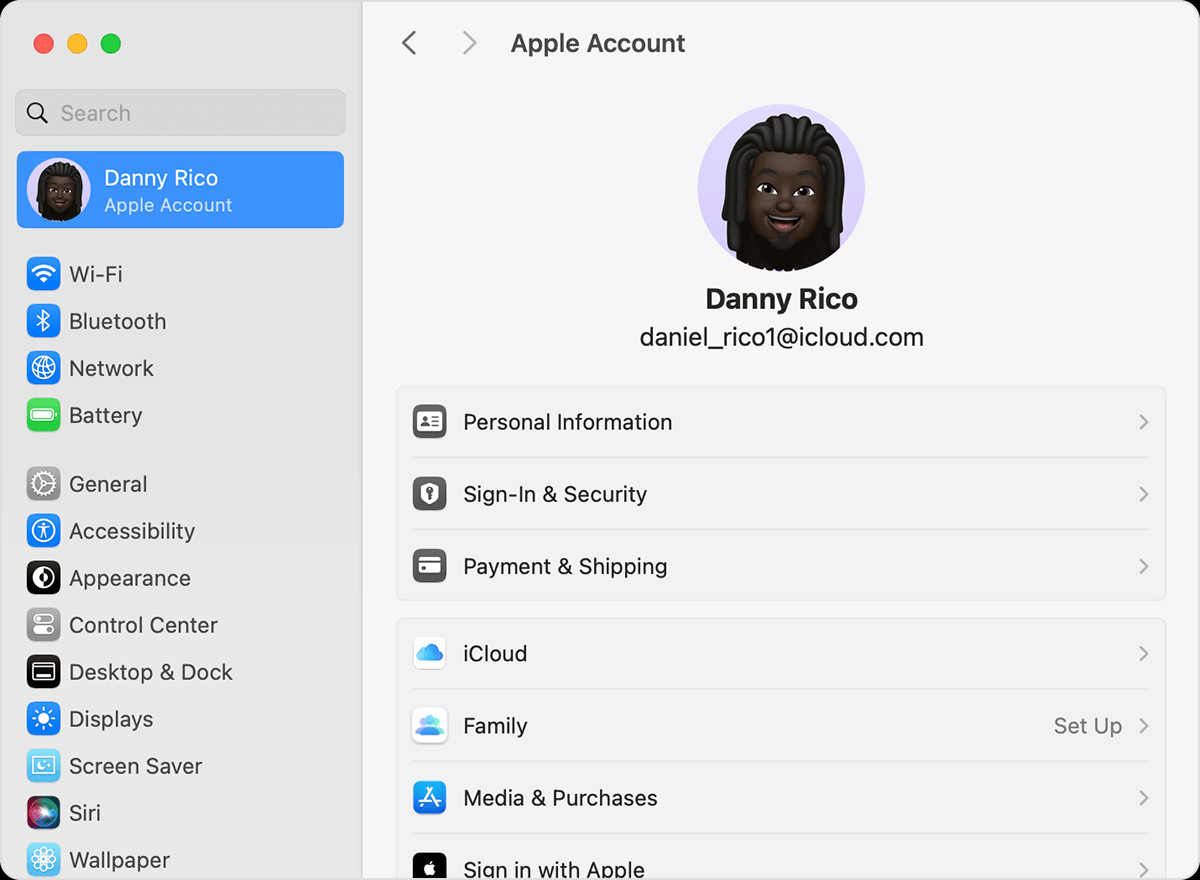 macOS screen showing the steps for setting up Family Sharing.
 -
Click Set Up Family.
-
Proceed by following the on-screen instructions to finalize the setup and send invitations to your family members.
Expanding Your Circle: Inviting Members to Your Family Group
Whether you chose to skip inviting members during the initial setup or you wish to add more members later, sending invitations is straightforward. You have the option to invite via Messages, email, or even in person. A useful feature is the ability to invite multiple Apple Accounts you own, consolidating your purchases across different accounts within the family share.
Inviting Family Members Using iPhone or iPad (iOS 16 or Later)
-
Launch the Settings app, and tap Family.
-
Tap the Add Member button to start inviting someone to your family group.
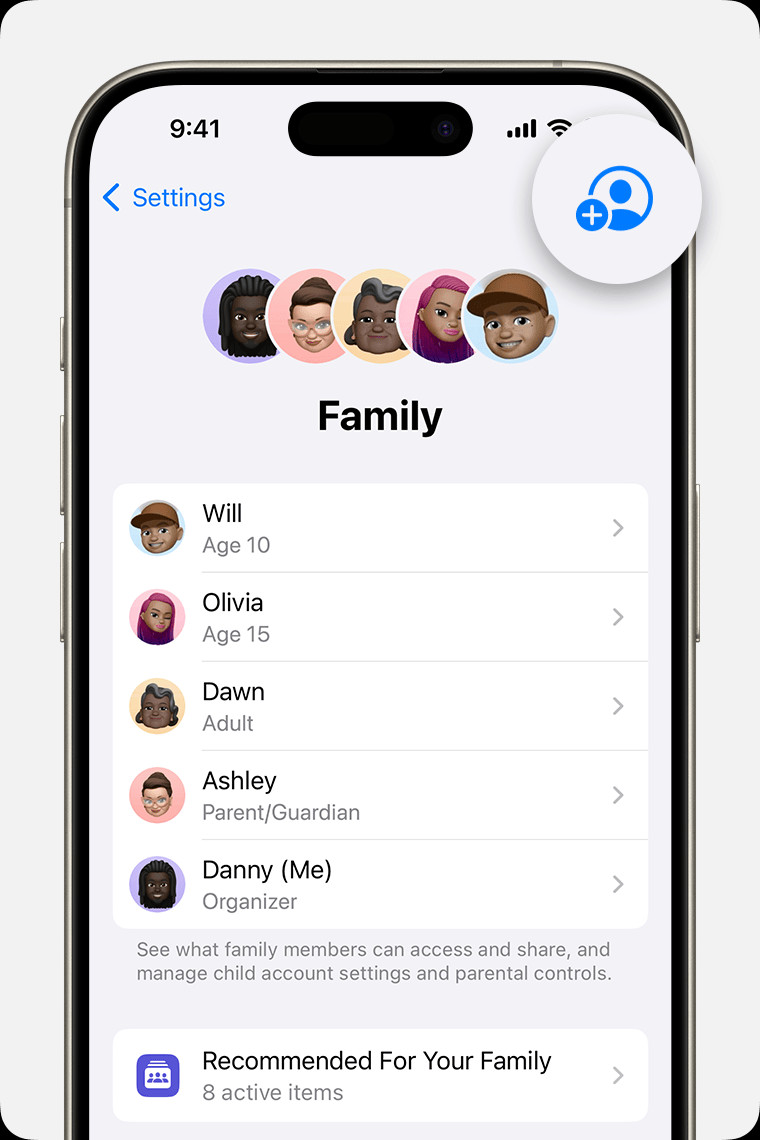 iPhone screen showing the steps for adding a member to your Family Sharing group.
 -
If you are adding a child who doesn’t yet have an Apple Account, select Create an Account for a Child. If the person you’re inviting already has an Apple Account, tap Invite People. They will need to enter their Apple Account password on your device to accept the invitation.
-
Continue to follow the on-screen instructions to configure parental controls, location sharing, and other Family Sharing features.
Inviting Family Members Using Your Mac (macOS Ventura or Later)
-
Navigate to the Apple menu  > System Settings.
-
Click on Family.
-
Click Add Member, and then follow the on-screen instructions to send out your invitation.
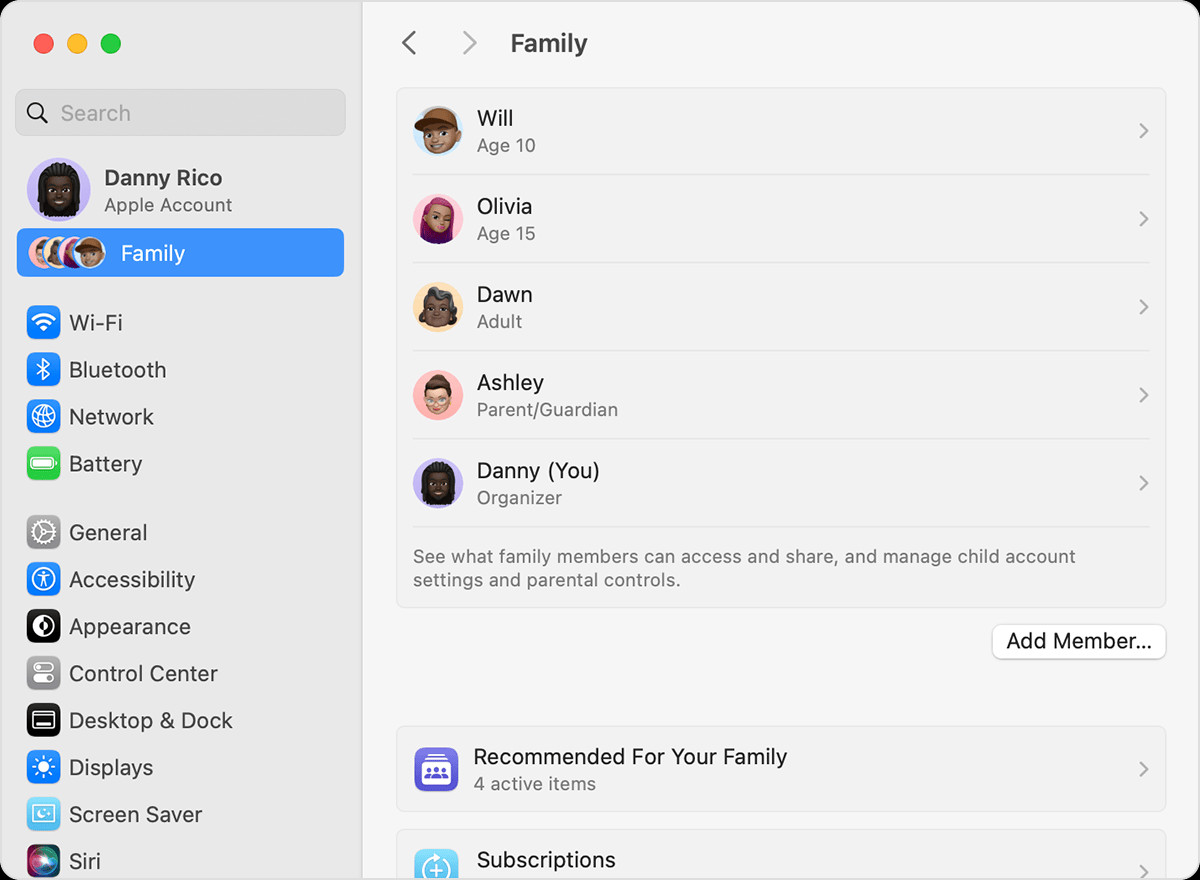 macOS screen showing the steps for adding a member to your Family Sharing Group.
Checking Invitation Status and Resending
After sending invitations, you can easily check whether they have been accepted and resend if necessary.
On your iPhone or iPad:
- Open Settings, then tap Family.
- Tap on the person’s name to view the invitation status.
- If needed, tap Resend Invitation to send it again.
On your Mac (macOS Ventura or Later):
- Go to Apple menu > System Settings, and then click Family.
- Click on the person’s name to check the status.
- Select Resend Invitation if the invitation needs to be resent.
Becoming Part of a Family: Joining a Family Group
Receiving an invitation to join Family Sharing is simple, and you can accept or decline directly from your device. Invitations are typically sent via email or text message, allowing you to respond directly from the message. If you happen to miss the initial invitation, you can still respond through your device settings. Keep in mind that you can only be part of one family group at a time.
Joining a Family Group on iPhone or iPad
- Open the Settings app, and tap on your name.
- Tap Invitations.
Follow the on-screen prompts to accept the invitation. Upon joining, you might be asked to confirm your account details and opt-in to features or services set up by the family organizer.
Joining a Family Group on Mac (macOS Ventura or Later)
- Go to the Apple menu > System Settings.
- Click Family.
Follow the on-screen instructions to accept the invitation and confirm your account information or opt into family features as prompted.
Troubleshooting Invitation Issues
If you encounter issues accepting an invitation, ensure that your Apple Account isn’t already part of another family group. Remember, Apple’s policy allows switching to a different family group only once per year.
Important Notes on Family Sharing:
- Not all digital content is eligible for Family Sharing. Availability may vary.
- Age restrictions for certain features like Apple Cash for children may vary by country or region.
- Accepted payment methods for purchases also vary depending on your country or region.
By following these steps, you can easily set up and manage Apple Family Sharing, making it simpler for your family to enjoy Apple’s services and stay connected.