Apple Watch for Your Family, previously known as Family Setup, allows family members without their own iPhones to experience the features of an Apple Watch. This is especially useful for children or older adults who may not have or need a separate iPhone but could benefit from the safety and communication features of an Apple Watch.
Understanding How Apple Watch for Your Family Works
With Apple Watch for Your Family, your family member can use their Apple Watch independently to make calls, send messages, and share their location. As the administrator, you’ll use your iPhone to set up and manage certain aspects of their watch, offering a balance of independence and oversight.
It’s important to note that while Family Setup brings many features to the Apple Watch without needing a separate iPhone, some advanced functionalities still require a direct iPhone connection and are not available in this setup. Also, the availability of Apple Watch For Your Family may vary by region. You can check what’s available in your country or region to ensure compatibility and feature support.
What You’ll Need to Get Started
While a cellular plan isn’t mandatory for setting up an Apple Watch for a family member, it unlocks many key features, especially for independent use. Consider a cellular plan to maximize the benefits of Family Setup.
Step-by-Step Guide to Setting Up Apple Watch for a Family Member
Let’s walk through the process of setting up an Apple Watch for a family member using your iPhone.
1. Power On and Prepare the Apple Watch
If the Apple Watch isn’t brand new, it’s best to erase it to start fresh. Once it’s ready, have your family member wear the watch or put it on yourself for setup. Press and hold the side button until the Apple logo appears on the screen.
 Apple Watch turning on, showing location of the side button
2. Initiate Pairing with Your iPhone
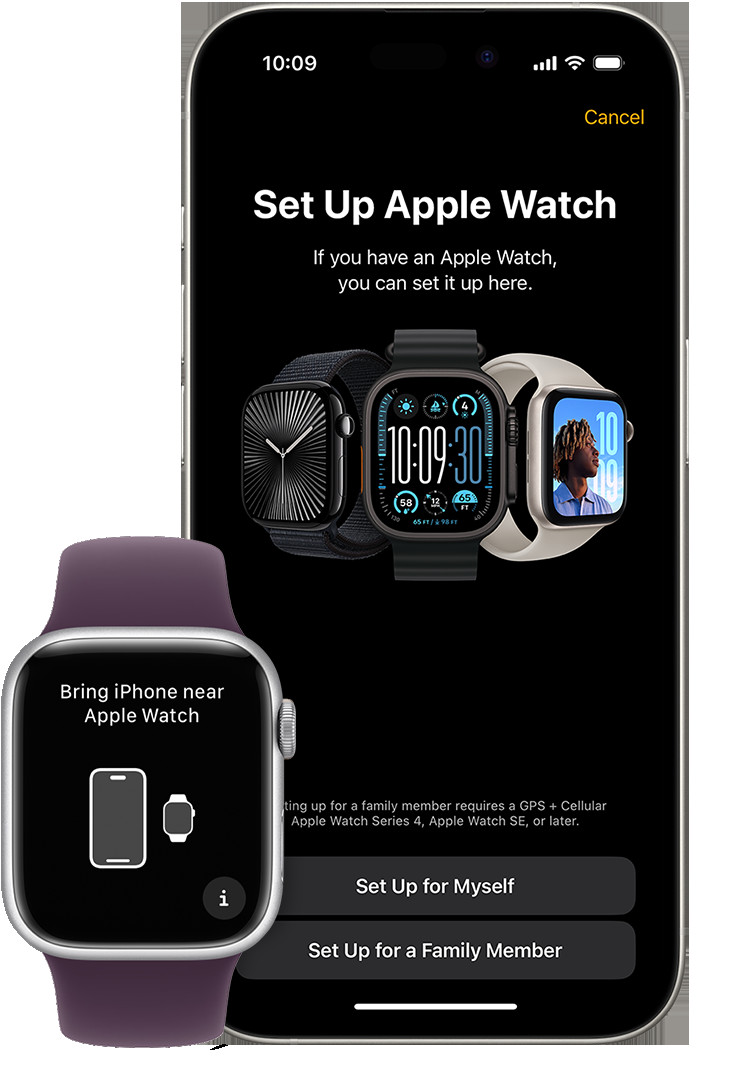
Bring the Apple Watch close to your iPhone. Wait for the message “Use your iPhone to set up this Apple Watch” to pop up on your iPhone screen, and then tap Continue. If this message doesn’t appear, you can manually start the process by opening the Apple Watch app on your iPhone, tapping All Watches, and then Add Watch.
Next, select Set Up for a Family Member, and tap Continue on the subsequent screen to proceed.
 Apple Watch and iPhone showing the pairing screens on each device
3. Pair the Apple Watch
Your iPhone will display an animation. Hold your iPhone over this animation, centering the watch face within the viewfinder on your iPhone. Wait for a confirmation message indicating that your Apple Watch is successfully paired. If you’re having trouble with the camera pairing, you can choose Pair Apple Watch Manually and follow the on-screen instructions.
After pairing, tap Set Up Apple Watch to move to the next steps.
 Apple Watch and iPhone showing the pairing animation on each device
4. Agree to Terms and Set Text Size
You’ll be prompted to agree to the Terms and Conditions. Tap Agree, and then choose your preferred text size for the Apple Watch display to ensure readability.
5. Secure the Watch with a Passcode
Setting up a passcode is crucial for securing the Apple Watch. Choose a passcode that your family member can easily remember but is also secure.
6. Choose the Family Member
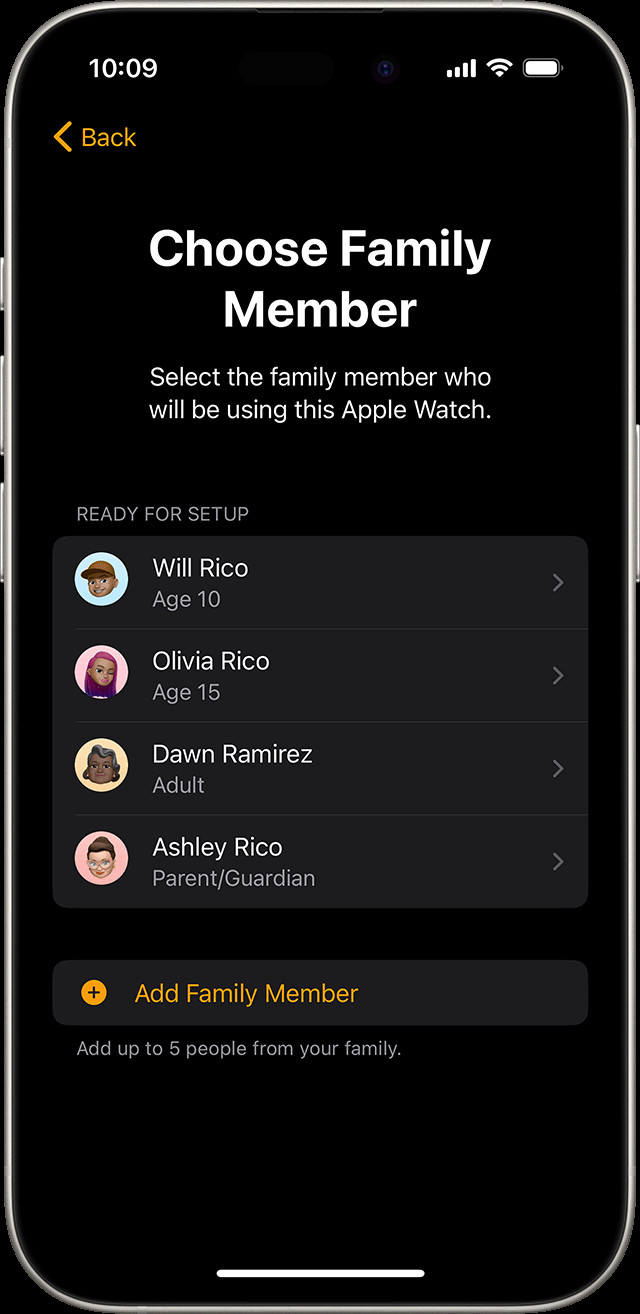
Now, you need to select the family member who will be using this Apple Watch. Choose from your family list. If the person isn’t listed, tap Add Family Member to add them.
Enter the family member’s Apple ID password when prompted, and tap Next.
 iPhone showing the screen on which a user chooses a family member who will use the watch
7. Configure Ask to Buy
If you wish to manage downloads and purchases made on the Apple Watch, enable Ask to Buy. This feature requires your approval for any transactions initiated from the watch.
8. Set Up Cellular and Wi-Fi – Connecting Your Family Plan
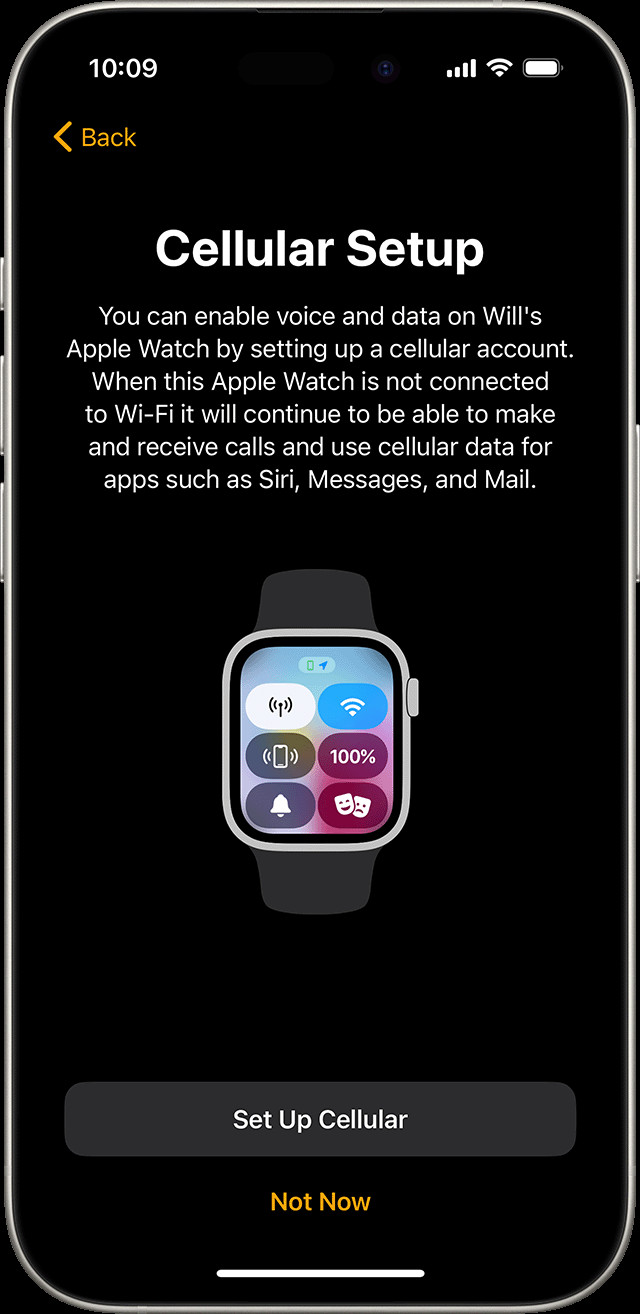
This is where you configure cellular service for the Apple Watch, allowing for independent connectivity. If your iPhone’s cellular provider supports Apple Watch For Your Family, you can add the watch to your existing family plan during this step. This integration often provides a convenient way to manage all devices under one account and potentially benefit from family plan discounts.
If your current carrier doesn’t support Family Setup, or if you prefer to use a different carrier, select Not Now. You can explore alternative carriers that support Apple Watch Family Setup from this list of supported carriers and contact them to establish a cellular plan directly.
Next, decide whether to share your current Wi-Fi network with the Apple Watch for connectivity at home.
 iPhone showing the Apple Watch cellular setup screen
It’s worth noting that some corporate cellular plans might not be compatible with Apple Watch For Your Family.
9. Enable Essential Features
In the following steps, you’ll be guided through enabling and setting up important Apple Watch features. These may include:
- Location Services for the Find My app, enhancing safety and location sharing.
- Siri, for voice commands and assistance.
- Apple Cash Family, for managing allowances and spending (US only, for users under 18).
- Messages in iCloud, to keep messages synced.
- Health Data, for tracking health metrics.
- Emergency Contacts and Medical ID, critical for safety.
- Activity tracking, to encourage movement and fitness.
- Time in Daylight and Workout Route Tracking for health insights.
- Photos, to personalize the watch face and view memories.
10. Set Up Shared Contacts and Schooltime
You’ll now be prompted to set up contacts accessible on the Apple Watch. This requires enabling Contacts in iCloud on your iPhone by going to Settings > [Your Name] > iCloud and ensuring Contacts is turned on.*
Choose trusted contacts from your Contacts app to share with the Apple Watch user. These can be managed later, along with setting up restrictions, in Screen Time on your iPhone.
Finally, set a Screen Time passcode for the watch and configure Schooltime if applicable. Once done, tap OK to complete the setup and start using the Apple Watch.
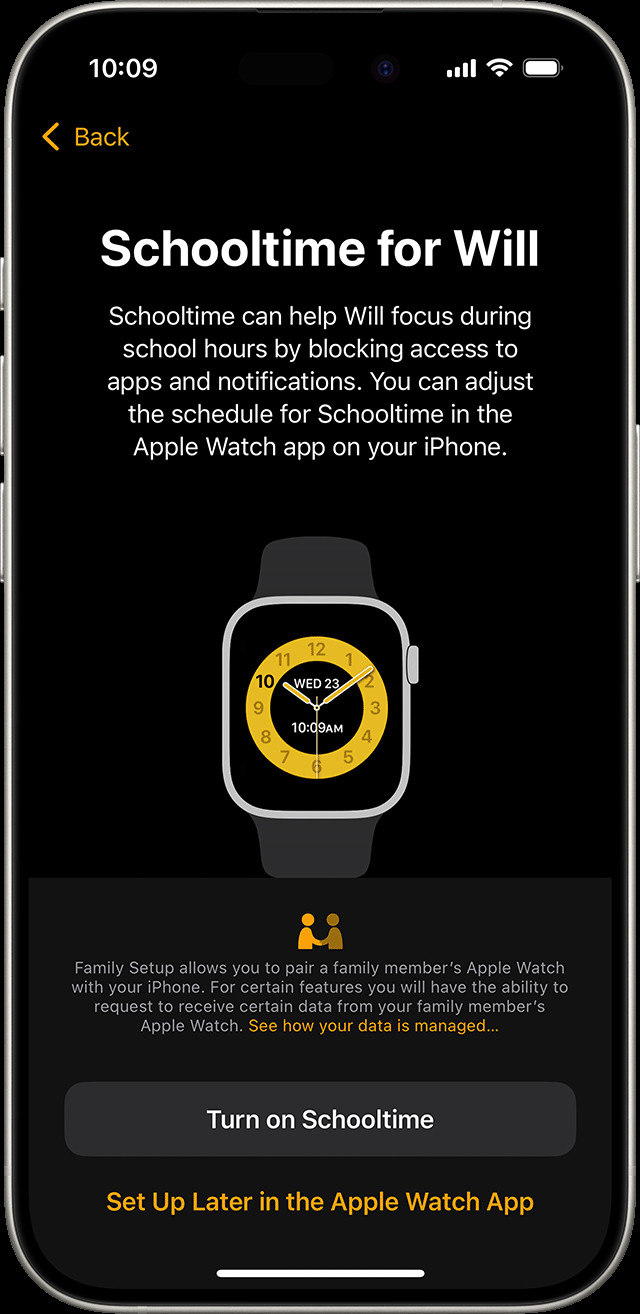 iPhone showing the Apple Watch Schooltime setup screen
For users in China mainland, ensure that the Contacts app on your iPhone is allowed to use wireless data. Open Contacts and allow data usage when prompted.
Managing Your Family Member’s Apple Watch
After the initial setup, you can always adjust settings and customize features directly from your iPhone.
- Open the Apple Watch app on your iPhone used for setup.
- Tap All Watches, then select the watch listed under Family Watches, and tap Done.
- Choose any setting to adjust according to your needs.
Feature and App Availability
It’s important to be aware of feature limitations when using Apple Watch For Your Family.
Health and Fitness Features:
- Heart rate notifications (high and low) are available for users 13+.
- Heart Rate Variability (HRV) and Fall Detection are available for users 18+.
- Activity app goals for users under 13 are based on move minutes instead of active calories.
- Daylight time measurement is available, and parents can monitor this through Health Sharing.
Apple Pay Features:
- Apple Cash Family is available for users under 18 (US only).
- Standard Apple Pay with credit or debit cards in the Wallet app is not supported with Family Setup.
Unavailable Features and Apps:
Certain apps and features are not available, including Medications, respiratory rate tracking, irregular heart rhythm notifications, ECG, AFib History, Cycle Tracking, Sleep tracking, Wrist Temperature, Blood Oxygen, Walking Steadiness, Audiobooks, Remote, News, Shortcuts, and the double tap gesture.
Taking the Next Steps with Your Family Watch Plan
Setting up an Apple Watch for a family member opens up new avenues for communication, safety, and connectivity without the need for a separate iPhone. Understanding where to watch your family plan – in terms of managing settings, features, and cellular options – is key to making the most of Apple Watch for Your Family. Explore the available cellular plans and features to tailor the Apple Watch experience to your family member’s needs, ensuring they benefit from the technology while staying connected and safe.